New life for an old laptop as a Linux home server
You might have something in mind that would benefit from having an "always-on, always-available" computer.
For myself, it started with a desire for network-attached storage for backups & Media Streaming.
Out of curiosity I decided to forego using commercial cloud-computing services and put together something myself. Install a stable Linux distribution such as Ubuntu (Desktop, then purged GUI) and gain access to tens of thousands of software packages with the ability to host all kinds of services.
Why use an old laptop as a home server?
Something like a Raspberry Pi is certainly one option, but they are Expensive in my country & one big advantage of the laptop option is I already have one not being used! You might also have a spare laptop, or know where to get one for little to no cost.
Old laptops can still deliver plenty of power for running a few services on a personal home server, and can include all sorts of things already built-in that would be extras on the Pi: things like a case, display, keyboard, multiple ports, and storage. Laptops are designed to be frugal with power and - if the battery still holds a charge - come equipped with their own built-in UPS!
So this is the plan: Pick a laptop. For my own project, I am restoring an old Windows Laptop to active duty with the latest release of Ubuntu Desktop for use as a home server.
why using desktop insted of ubuntu-server?
Why opt for a desktop OS over Ubuntu Server, you might wonder? Well, after experimenting with various data-center-oriented operating systems, I encountered consistent networking issues that left me less than impressed.
That's when I made the switch to Ubuntu Desktop, a choice I haven't regretted. By coupling it with my Ubuntu Pro License, I unlocked the power of LivePatch and Network Manager. The beauty of Ubuntu Desktop lies in its user-friendly Network Manager, sparing me the hassle of manually editing the /etc/network/interfaces file every time I needed to establish a new connection – a common ordeal with data-center-centric OSs.
Intrigued by the idea of taking matters into my own hands,I on a journey with Ubuntu, initially with the desktop version, later purging the GUI to streamline performance. This choice opened the door to a vast repository of software packages, providing the flexibility to host a wide array of services.
This is how I do it ...
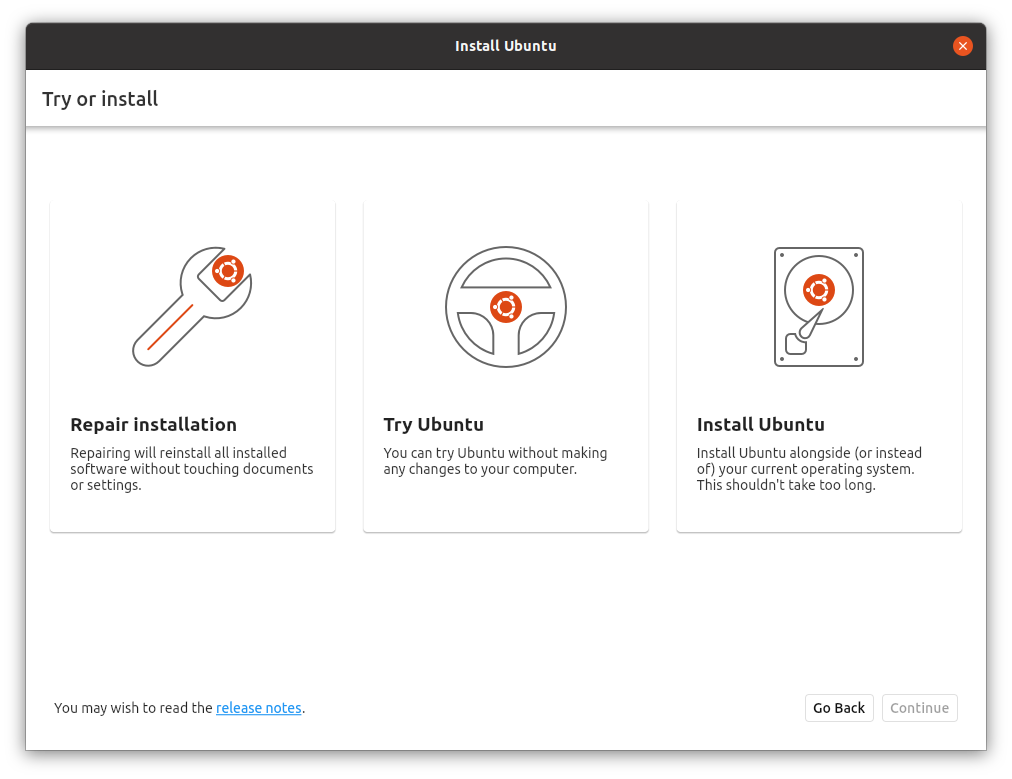
1. Install Ubuntu Desktop
Traditional way of installing Ubuntu Desktop
2. Configure
2.1 Enable SSH
The procedure to install ssh command on Ubuntu is as follows:
- Open the terminal application.
- Install the ssh package on Ubuntu by typing: sudo apt install openssh-client
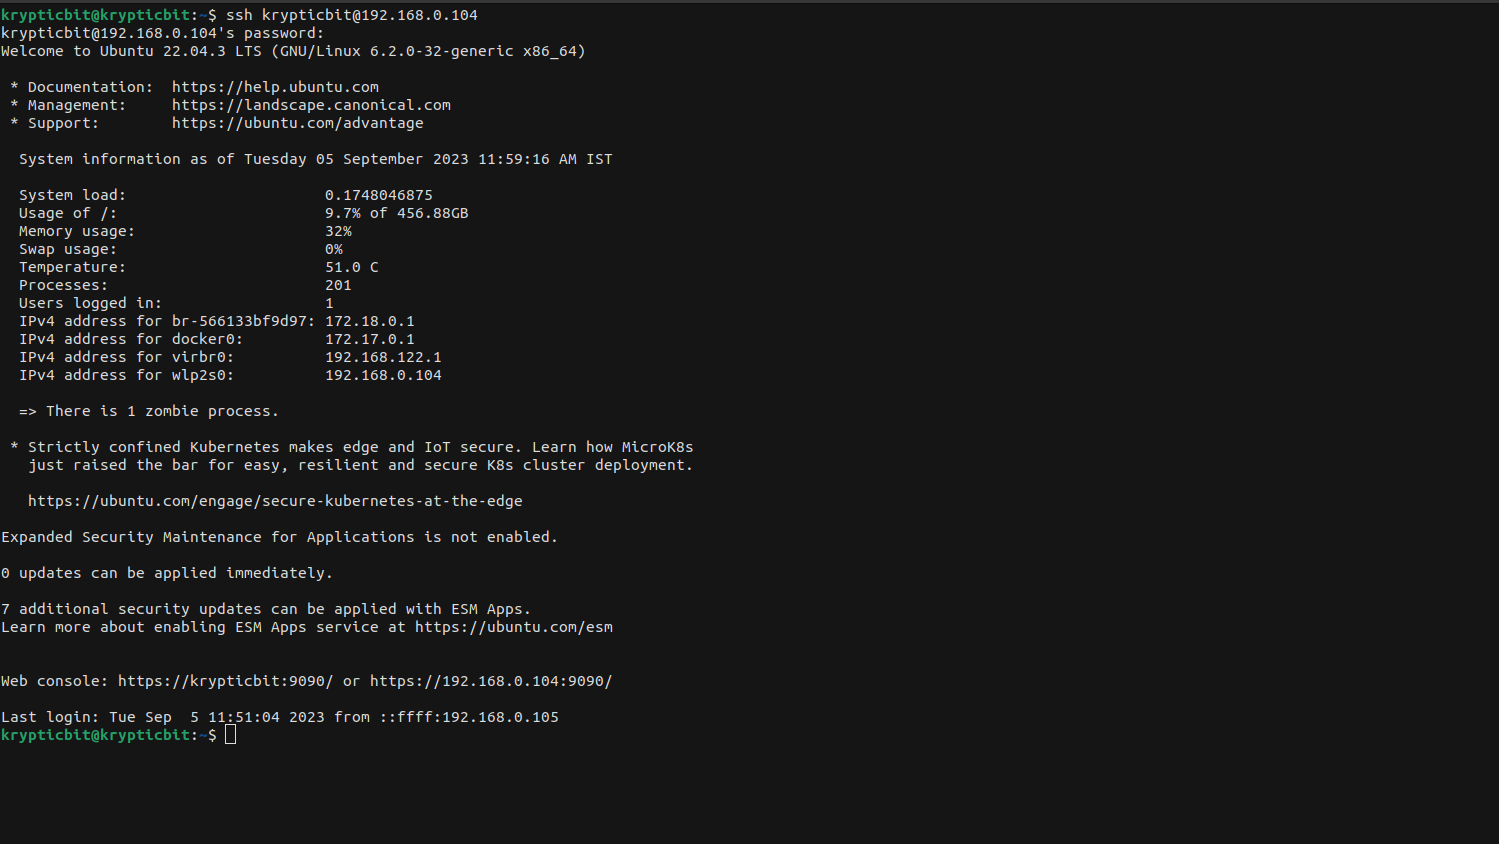
- Once the installation done, use it by typing from the CLIENT: ssh user@server-ip-here
2.1.1 Auto-Start SSH on Boot
sudo systemctl start ssh //for Starting SSH service on boot.
sudo systemctl restart ssh // For Restarting SSH service if user make changes in config otherwise rarely used.
2.1.2 Enable ufw and open ssh port
By default, firewall will block ssh access. Therefore, you must enable ufw and open ssh port
Execute: sudo ufw allow ssh
3. Terminal multiplexer: tmux
Useful on desktops and especially on servers, tmux launches a session in the console that can be divided into multiple windows and panes (multiplexing).
Where it really makes a difference from simply opening multiple terminals or logins, though, is the ability to detach/re-attach sessions. Login to the server, open several windows, run ongoing processes, detach session, logout, login, re-attach session, and restore your working environment!
Install ...
$ sudo apt install tmux
Even you can go with Screen, but i prefer tmux.
4. Converting Ubuntu-Desktop to Ubuntu-Server
Step 1: Installing Server Packages
To initiate this process, you'll want to begin by installing the essential server packages on your system. To get started, open a terminal and execute the following command:
sudo apt install ubuntu-serverStep 2: Setting the Default Target
Once your system has completed the reboot process, the next step is to configure the default target to operate in multi-user mode. This mode optimizes your system by conserving RAM and CPU resources, as it abstains from initiating the graphical user session. To set the default target accordingly, execute the following command:
sudo systemctl set-default multi-user.targetThis command will ensure that your system starts up in multi-user mode by default, which is particularly beneficial for server environments where graphical user interfaces are unnecessary and can be resource-intensive.
Step 3: Disable suspend-on-close
In normal operation, closing the laptop lid would suspend the system. Not what we want for our laptop home server! To enable the server to continue operating on lid closure, set /etc/systemd/logind.conf to ignore the action.
Change ...
#HandleLidSwitch=suspend
... to ...
HandleLidSwitch=ignore
Restart systemd-logind.service ...
$ sudo systemctl restart systemd-logind.service
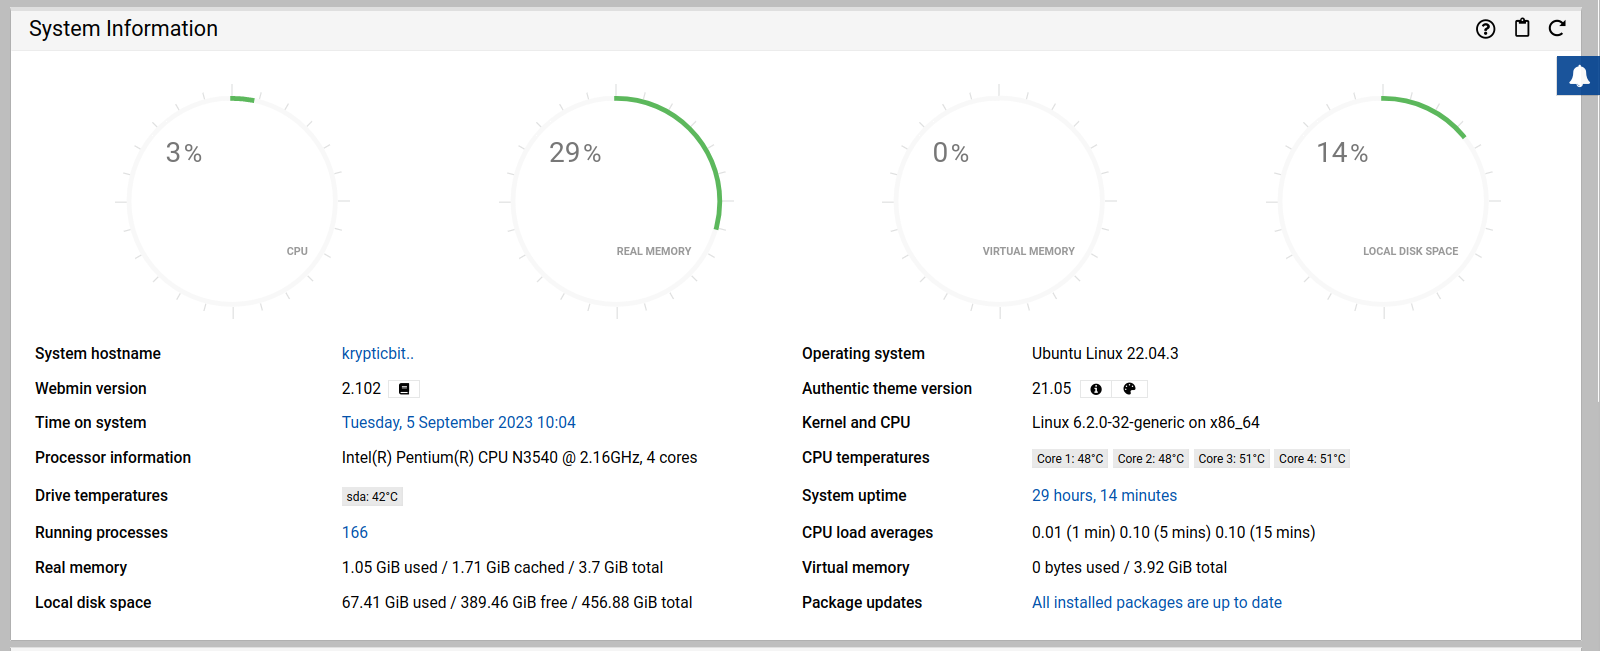
Step 4: Install Web-based system adminstation tool
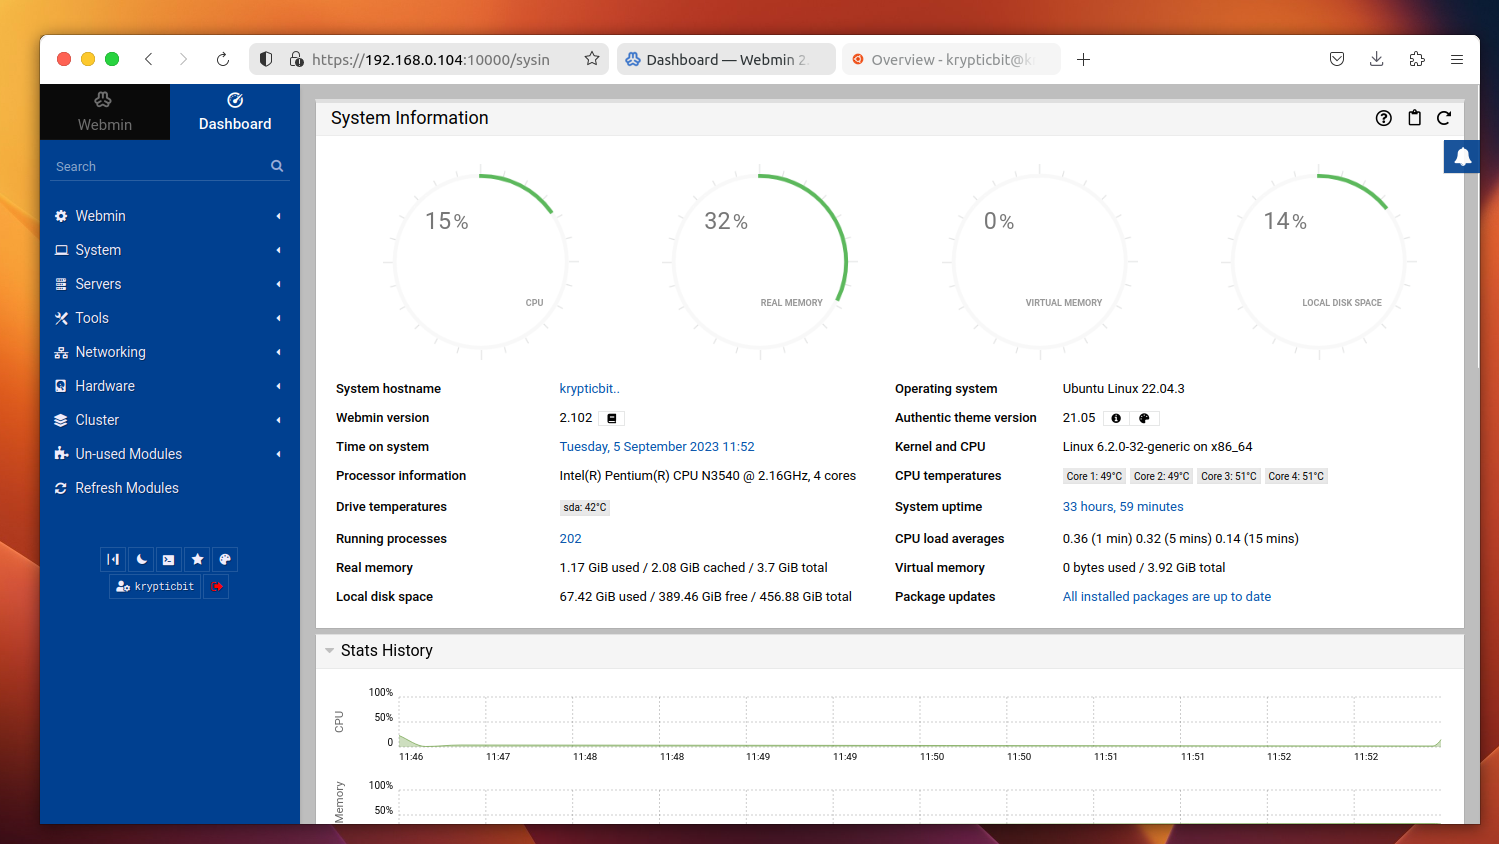
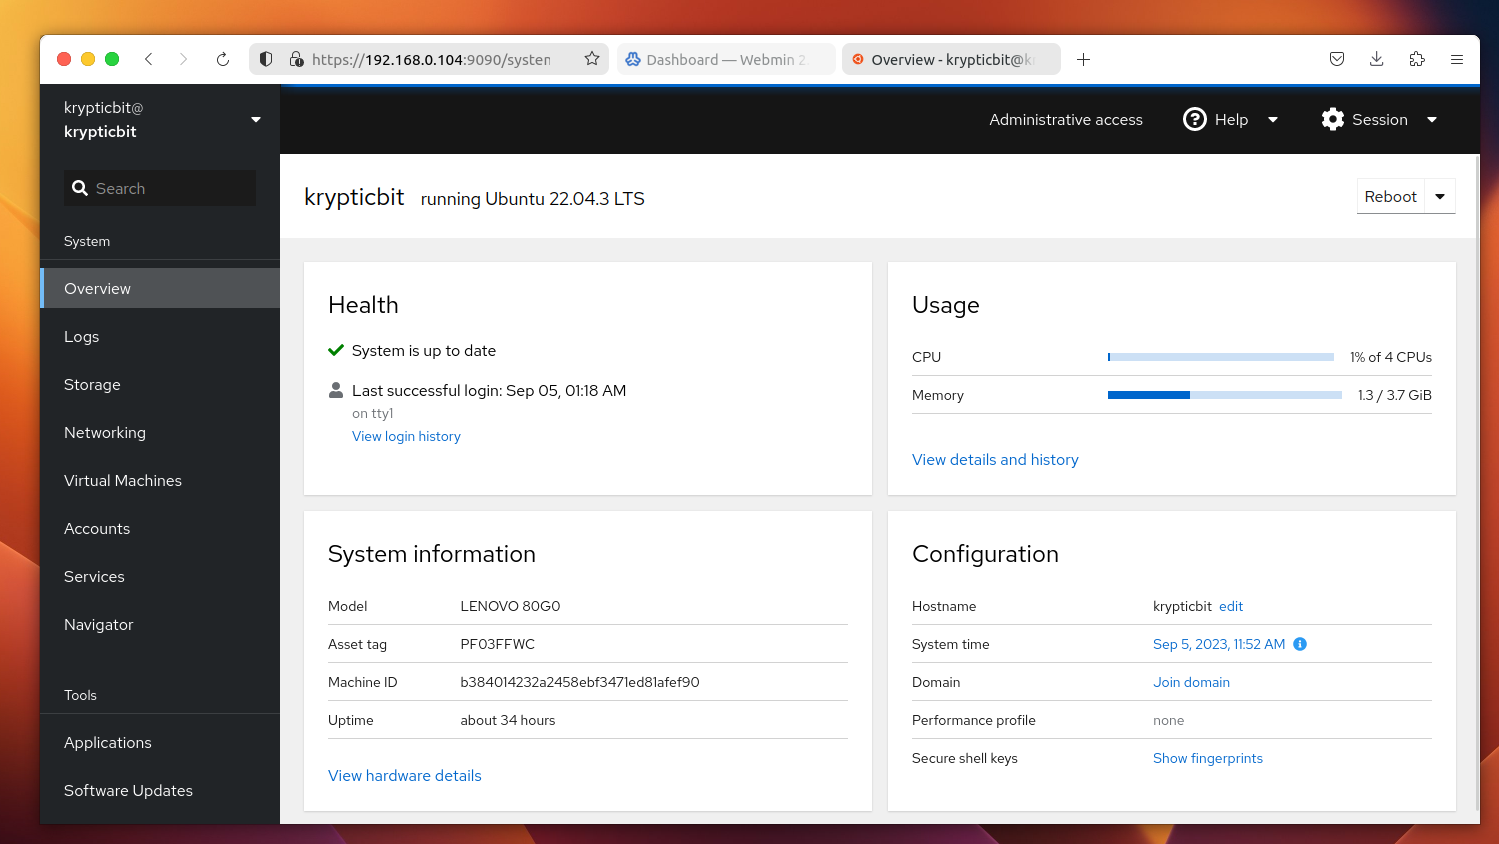
Well, when it comes to web-based system administration tools, you've got quite a selection to choose from. But if we're talking about the cream of the crop, it often boils down to Webmin and Cockpit – they're both top-notch options.
Pros of Cockpit:
Cockpit:
It prioritizes simplicity. With Cockpit, you can effortlessly monitor system performance, manage users, configure networks, and even oversee containers and virtual machines, all within an elegant web interface.
Step 5: Removing Unnecessary Packages (Optional)
When it comes to streamlining the desktop edition by shedding those unnecessary packages, there's a nifty command that does the trick. Just fire up your terminal and run this command:
sudo apt purge ubuntu-desktop -y && sudo apt autoremove -y && sudo apt autocleanStep 6: Final Reboot
To wrap up the conversion process, give your system one last reboot. Simply execute the following command:
sudo rebootThis final step ensures that all changes take effect, providing you with a freshly configured system.